===
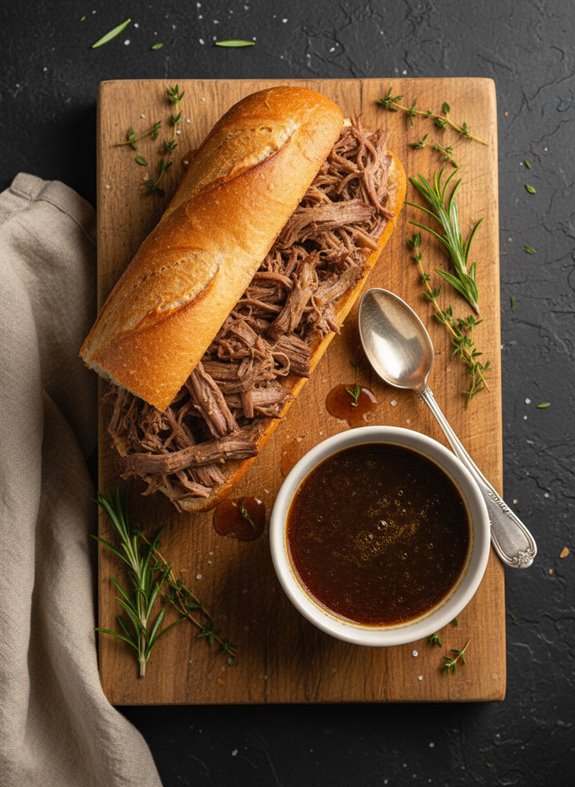
Why You’ll Love This Savory French Dip Sandwich with Au Jus
If you’ve ever craved a meal that’s both comforting and impressive, this French Dip sandwich is about to become your new obsession. I’m talking tender beef that falls apart at the touch, swimming in a rich, savory broth that’s perfect for dipping.
What makes this recipe special? It’s ridiculously simple yet delivers restaurant-quality results. The slow cooker does all the heavy lifting while you go about your day.
And that au jus? Pure magic. The combination of soy sauce and herbs creates a broth so flavorful you might be tempted to drink it straight—no judgment here.
What Ingredients are in Savory French Dip Sandwich with Au Jus?
Creating the perfect French Dip sandwich doesn’t require a complicated shopping list, which is part of its enduring appeal. The magic happens when simple, quality ingredients meld together during the slow cooking process. The beef becomes tender and infused with herbs while the cooking liquid transforms into that irresistible au jus we all crave for dipping.
Ready to gather what you need for this mouthwatering meal?
- 2 pounds beef roast
- 3 cups water
- 1 cup light soy sauce
- 1 teaspoon dried rosemary
- 1 teaspoon dried thyme
- 1 teaspoon garlic powder
- 1 bay leaf
- 3 peppercorns
- French rolls or baguette (for serving)
While the ingredient list is straightforward, there are a few things to reflect on for maximum flavor. For the beef, chuck roast works wonderfully, but you could also use rump roast or bottom round if that’s what’s available.
The quality of your soy sauce matters too—opt for a good light soy sauce rather than the dark variety, which might overpower the other flavors.
And those French rolls? They should be slightly crusty on the outside but soft inside to soak up that delicious au jus without falling apart. Might I suggest warming them slightly before assembling your sandwich?
Heaven on a plate, truly.
How to Make This Savory French Dip Sandwich with Au Jus
Making a French Dip sandwich couldn’t be simpler, and your slow cooker does most of the heavy lifting. Start by placing your 2 pounds of beef roast directly into the slow cooker—no browning necessary (though you certainly could for extra flavor). Pour in 3 cups of water and 1 cup of light soy sauce, creating the base for what’ll become your heavenly au jus.
Now for the aromatics: add 1 teaspoon dried rosemary, 1 teaspoon dried thyme, 1 teaspoon garlic powder, 1 bay leaf, and 3 peppercorns. These simple herbs and spices will transform your beef from ordinary to extraordinary as they slowly infuse throughout the cooking process.
Cover your slow cooker and set it to low for 5-6 hours. The magic of slow cooking means you can walk away and let time do the work—the meat will become so tender it practically falls apart when you look at it. Once the cooking time is complete, remove the meat from the broth and shred it using two forks. The beef should pull apart effortlessly, a sign that you’ve done everything right.
Meanwhile, strain the remaining liquid to remove the herbs and spices, then skim off any fat that’s risen to the top. What remains is your liquid gold: the au jus for dipping.
To assemble your French Dip sandwiches, warm your French rolls or baguette slices (a quick toast in the oven works wonders), then pile the shredded beef generously onto the bottom half. You might be tempted to add cheese or other toppings—and who am I to stand in your way?—but a classic French Dip lets the meat and that savory broth take center stage.
Serve each sandwich with a small bowl of the strained au jus alongside for dipping. The contrast between the slightly crisp bread exterior and the warm, juicy beef, followed by that extra flavor bomb when you dip into the broth? That’s what food dreams are made of, my friends.
Savory French Dip Sandwich with Au Jus Substitutions and Variations

While the classic French Dip sandwich recipe I’ve shared is downright delicious, who says you have to follow it to the letter?
I often swap beef roast with brisket or chuck for different flavors and textures.
Not a beef fan? Try pulled pork or even portobello mushrooms for a vegetarian twist.
The au jus can be customized too—add red wine for richness, beef broth instead of water, or throw in some onions while it simmers.
Sometimes I skip the rosemary and use Italian herbs instead.
And the bread, well, that’s your canvas. Ciabatta, sourdough, or even a crusty baguette work beautifully.
What to Serve with Savory French Dip Sandwich with Au Jus

A French dip sandwich practically begs for the perfect sidekick to round out your meal.
I love pairing mine with crispy potato chips or homemade french fries—something about that crunch against the tender beef just works.
A simple coleslaw adds freshness and cuts through the richness of the au jus, while pickles offer that tangy contrast we all crave.
For something heartier, try a cup of tomato soup or onion soup, which plays nicely with the beef flavors.
And don’t forget a cold beer or iced tea to wash it all down.
Trust me, these pairings take your sandwich from good to memorable.
Final Thoughts
Once you’ve mastered this French dip sandwich recipe, you’ll find yourself craving it on cold winter nights and busy weekday evenings alike.
The beauty of slow cooking is how it transforms an ordinary beef roast into something extraordinary with minimal effort.
I’ve served this at everything from casual family dinners to game day gatherings, and the pot is always scraped clean.
The rich au jus makes all the difference, doesn’t it? Those deep flavors developing over hours while you go about your day.
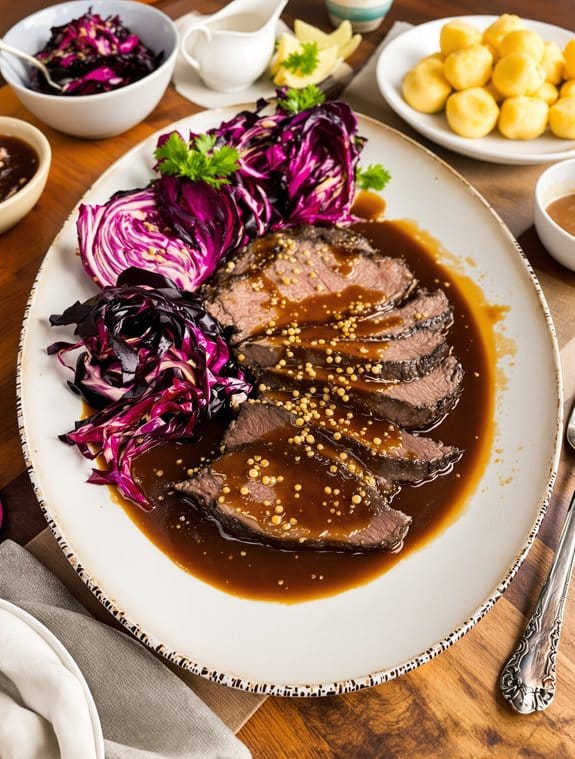
German Sauerbraten
Ingredients
Equipment
Method
- Wipe the beef chuck roast with a damp cloth and place it in a plastic container with a lid.
- In a separate bowl, combine the cloves, boiling water, bay leaves, salt, sliced onions, red wine vinegar, peppercorns, and juniper berries.
- Pour this marinade over the meat, cover, and refrigerate for 3 to 6 days. Turn the meat twice daily using wooden spoons, never piercing it with a fork.
- After marination, remove the meat from the marinade but reserve the liquid for later use.
- Heat the shortening in a large skillet and brown the meat slowly on both sides until it develops a rich, caramelized crust.
- Add the reserved marinade to the skillet, cover, and simmer for 2½ to 3 hours until the meat becomes fork-tender.
- Once the meat is tender, remove it along with the onions and keep them warm.
- Strain the marinade and measure the liquid, adding water if needed to make 2½ cups.
- Return this liquid to the skillet and add the cabbage wedges (with toothpicks inserted to hold them together), then cover and simmer for 10 minutes.
- Stir in the crushed gingersnap cookies and sugar into the liquid with the cabbage, simmering for at least 3 minutes until you have a velvety gravy.
- When serving, arrange the cabbage wedges (toothpicks removed) on a hot platter alongside the meat and onions, with the gingersnap gravy served on the side.
Notes
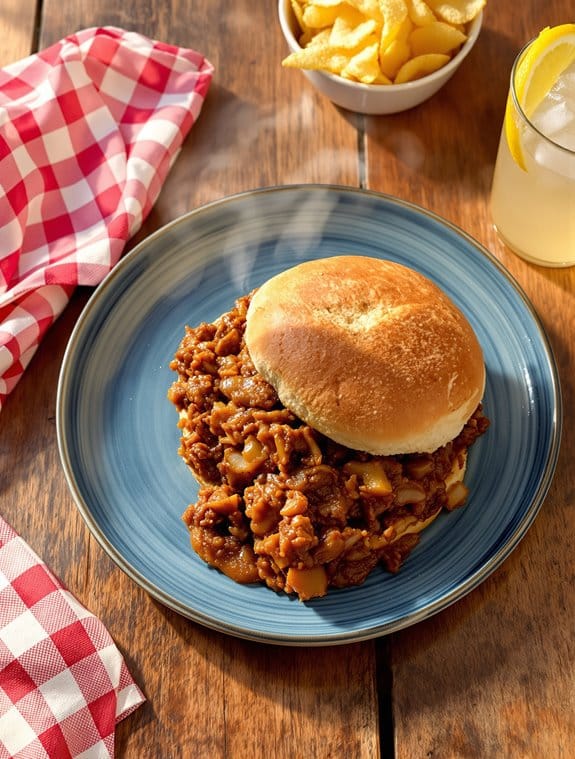
Sloppy Joes
Ingredients
Equipment
Method
- Brown the ground round in a large skillet over medium heat for 7-8 minutes, breaking up the meat with a wooden spoon as it cooks.
- Drain off any excess fat from the skillet.
- Return the skillet to the heat and add the chopped onion and salt. Cook for about 5 minutes until the onions soften and become translucent.
- In a bowl, combine the ketchup, mustard, vinegar, Worcestershire sauce, and sugar. Stir well to blend the sauce ingredients.
- Pour the sauce mixture into the skillet with the meat and onions, stirring well to coat everything evenly.
- Reduce the heat to low and let the mixture simmer for 1 hour, stirring occasionally. The sauce will thicken slightly as it cooks.
- Serve the hot Sloppy Joe mixture on hamburger buns or kaiser rolls.
Notes

Rustic Pizza Bianca
Ingredients
Equipment
Method
- Place a towel under your stand mixer to stabilize it. In the mixer bowl fitted with a dough hook, combine flour, water, and table salt. Mix on low speed for 3-4 minutes until no dry flour remains, scraping down sides as needed.
- Allow the dough to rest for 20 minutes for proper hydration.
- Sprinkle yeast and sugar over the rested dough. Knead on low speed until combined, then increase to high speed and continue kneading until the dough becomes glossy and smooth, pulling away from the sides while the mixer runs (approximately 6-10 minutes).
- Coat a bowl with 1 tablespoon of olive oil. Transfer the dough to the bowl, then pour another tablespoon of olive oil over top and flip once to coat completely. Cover tightly with plastic wrap.
- Let the dough rise until nearly tripled in size, about 2 to 2½ hours.
- During the last hour of rising, place a pizza stone on the middle rack and preheat your oven to 450°F (230°C).
- Coat a rimmed baking sheet with 2 tablespoons of olive oil. Gently transfer the risen dough to the sheet and stretch it toward the edges using your fingertips. Don't worry if it doesn't reach the corners completely.
- Let the dough rest in the pan for 5-10 minutes until bubbly, then prick the surface 30-40 times with a fork and sprinkle with kosher salt.
- Bake for 10-15 minutes, then sprinkle with fresh rosemary leaves. Rotate the pan and bake for another 10-15 minutes until golden brown.
- Immediately brush the hot bread with the remaining 1 tablespoon of olive oil. Slice and serve warm.
Notes

Cranberry Turkey Stuffing Balls
Ingredients
Equipment
Method
- Preheat your oven to 375°F (190°C) and lightly grease a baking sheet with cooking spray or line it with parchment paper.
- In a large mixing bowl, combine the cooked stuffing, finely chopped cooked turkey, chopped dried cranberries, and shredded cheese.
- Sprinkle in the garlic powder, onion powder, and dried sage (if using), then season with salt and black pepper. Pour in the melted unsalted butter and add the lightly beaten egg, stirring until the mixture holds together when pressed.
- Using about 2 tablespoons of the mixture at a time (a cookie scoop works perfectly), gently roll it between your palms to form golf ball-sized spheres. Place them on the prepared baking sheet, ensuring a little space between each ball.
- Bake in the preheated oven for 20-25 minutes, or until the balls are golden brown on the outside and heated through. The cheese inside will melt beautifully, infusing each bite with delicious flavor.
Notes
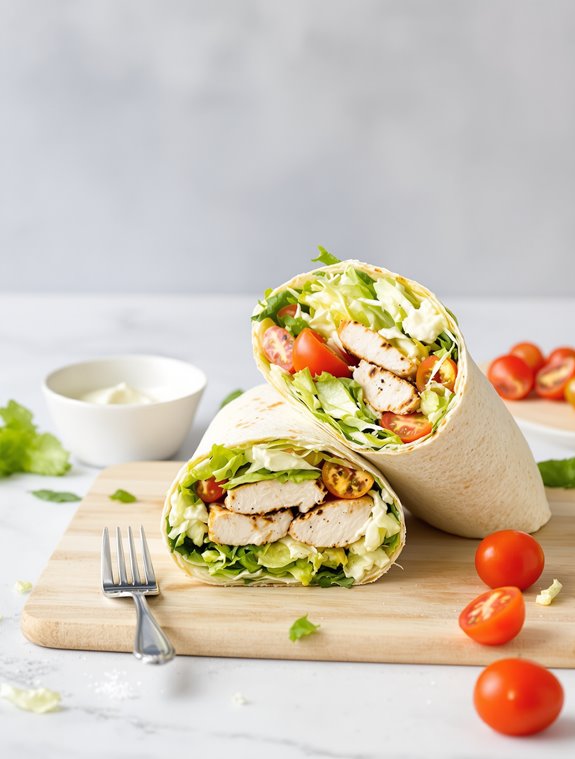
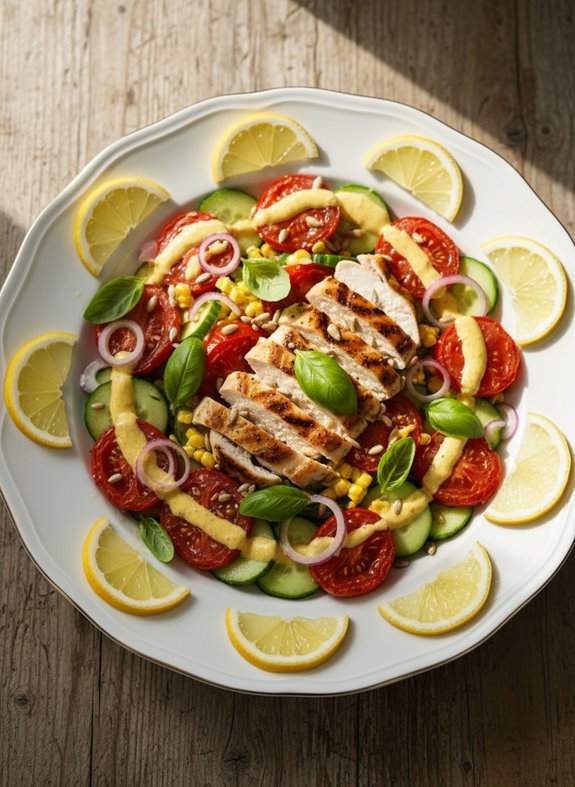
Delightful Chicken Salad Wrap
Ingredients
Equipment
Method
- Place chicken breasts under a hot broiler for approximately 7 minutes on each side, until thoroughly cooked with no pink remaining.
- While the chicken cooks, prepare your other ingredients by slicing the lettuce and cherry tomatoes.
- Allow the chicken to cool slightly before slicing it into strips.
- Lay out the soft tortillas and spread each with an even layer of light cream cheese.
- Arrange the sliced lettuce and cherry tomatoes on top of the cream cheese layer.
- Place the sliced chicken on top of the vegetables and season with salt and pepper to taste.
- Roll up each tortilla, tucking in the sides as you go to keep the filling contained.
- Serve immediately or wrap tightly for later consumption.
Notes
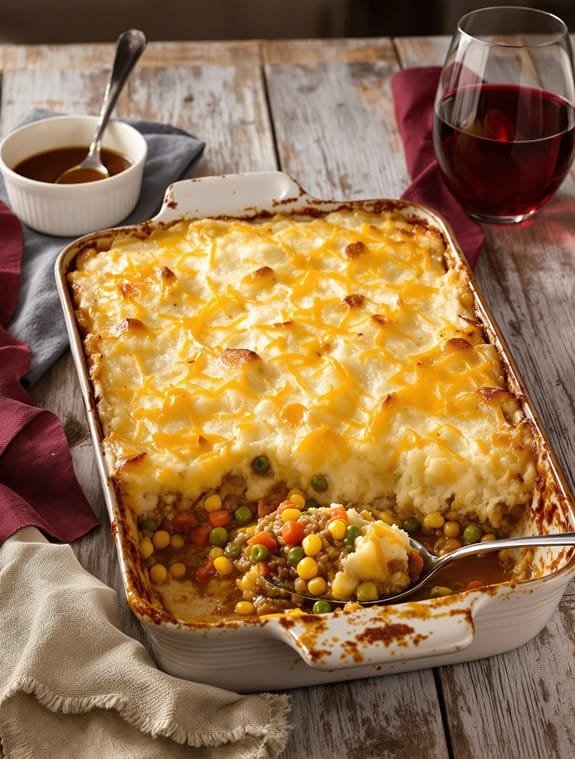
Shepherd's Pie
Ingredients
Equipment
Method
- Boil the peeled and cubed russet potatoes until fork-tender, about 15 minutes.
- Drain potatoes and return them to the warm pot. Mash with the egg, chicken broth, milk, and softened butter. Season with salt and pepper to taste until smooth. Set aside.
- Preheat oven to 375°F.
- Heat a large skillet over medium-high heat and spray with cooking spray. Add ground beef, season with salt and pepper, and brown for about 5 minutes.
- Add the shredded carrot and chopped onion to the beef, cooking for another 5 minutes until vegetables soften.
- In a small saucepan, whisk together the beef onion soup mix, dried onions, flour, and water. Bring to a low boil and simmer for 3-4 minutes.
- Add Worcestershire sauce to the gravy mixture and continue cooking until thickened.
- Pour the gravy over the meat mixture, then stir in frozen peas, frozen corn, and frozen hash browns. Simmer for about 5 minutes until vegetables are heated through.
- Transfer the filling to a 13×9-inch casserole dish and spread the mashed potatoes evenly on top.
- Sprinkle sharp cheddar cheese over the potatoes and bake for 20 minutes until the cheese is bubbling and golden.
- Allow to rest for 5-7 minutes before serving to help it set properly.
Notes
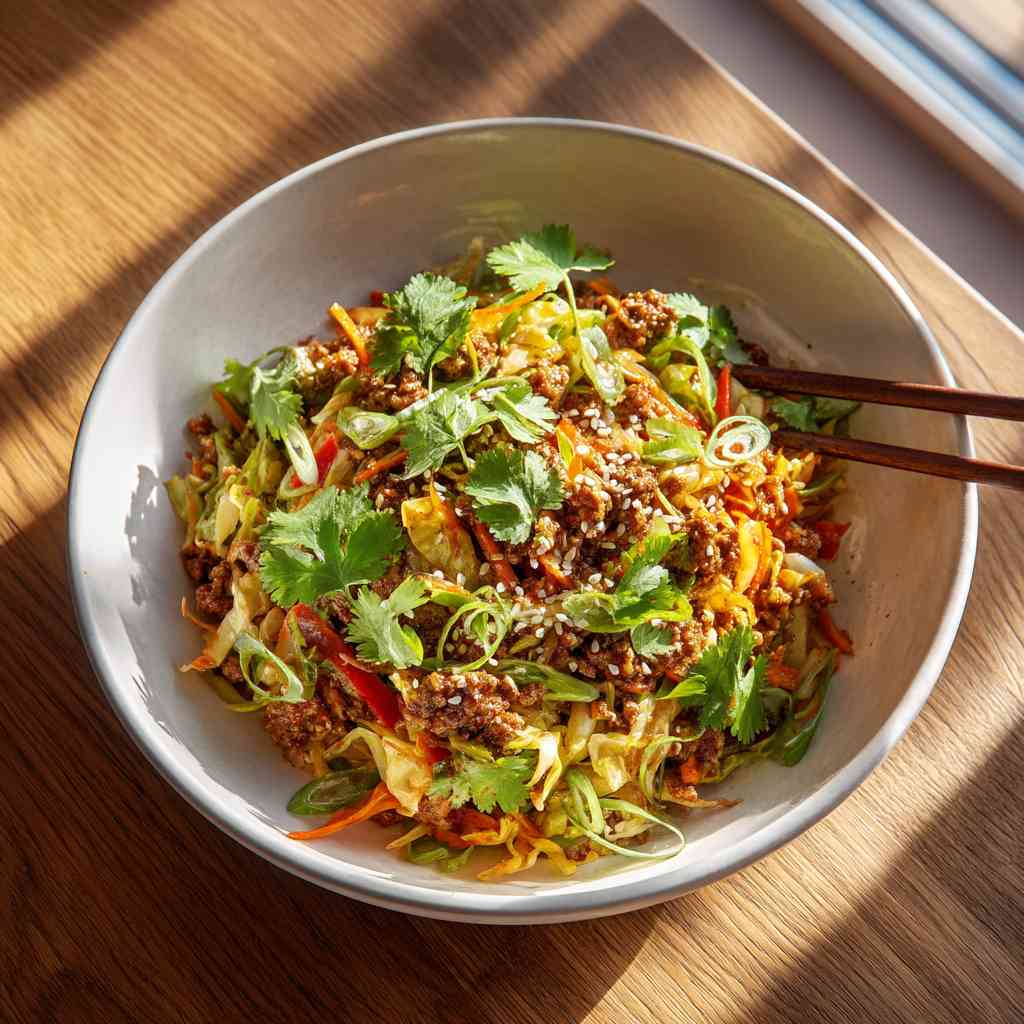
Quick & Healthy Egg Roll in a Bowl
Ingredients
Equipment
Method
- Heat 1 tablespoon of olive oil in a large, deep skillet over medium heat.
- Add the chopped yellow onion and minced garlic, cooking until softened and fragrant.
- Add 1 pound of breakfast sausage to the skillet. Break it apart with a wooden spoon and cook until it is browned and no longer pink.
- In a small bowl, mix together 1/3 cup soy sauce and 1/4 teaspoon ground ginger.
- Add both 16-ounce bags of dry coleslaw mix to the skillet. Stir everything together so the cabbage and carrots can blend with the cooked sausage and aromatics.
- Pour the soy sauce mixture over the contents of the skillet and cook for an additional 5 minutes, until the cabbage is slightly wilted but still retains a bit of crunch.
- Garnish with sliced green onions and serve immediately.
Notes

Rustic Ratatouille
Ingredients
Equipment
Method
- Heat a generous amount of olive oil in a Dutch oven or large saucepan over medium heat.
- Add garlic and onion, cooking until tender and fragrant, about 3-5 minutes. The onions should become translucent but not browned.
- Add the eggplant, zucchini, and green peppers along with the dried oregano, basil, and parsley. Stir well to coat everything with oil and herbs.
- Sauté the vegetables for about 5 minutes, just until they begin to soften while maintaining their shape.
- Pour in the crushed tomatoes and season with salt and freshly ground pepper to taste.
- Cover the pot, reduce heat to low, and simmer gently for about 45 minutes. Check occasionally to ensure nothing sticks to the bottom of the pot.
- Serve hot, at room temperature, or chilled after refrigerating overnight for enhanced flavor.
Notes

Gazpacho
Ingredients
Equipment
Method
- Wash and coarsely chop the tomatoes, reserving all the juice.
- Core, seed, and roughly chop both the red and yellow bell peppers.
- Peel, seed, and chop the cucumbers.
- Dice the celery stalks.
- Chop the red onions and shallots.
- In a small bowl, whisk together the red wine vinegar, olive oil, and V8 vegetable juice along with the reserved tomato juice.
- Working in small batches, puree the prepared vegetables in a blender or food processor. Don't over-process - maintain some texture for a chunky consistency.
- Add the tomato juice mixture as needed during blending to achieve desired consistency.
- Once all vegetables are processed, combine in a large bowl and stir in the cayenne pepper, chopped fresh dill, salt, and freshly ground black pepper.
- Cover and refrigerate for at least 4 hours, preferably overnight, to allow flavors to develop.
- Taste and adjust seasonings before serving chilled.
Notes
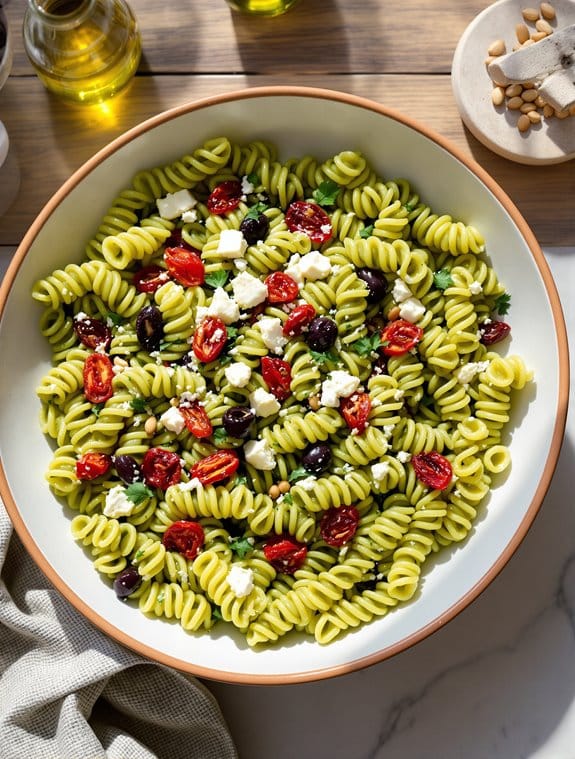
Mediterranean Pesto Pasta
Ingredients
Equipment
Method
- Cook pasta in generously salted water according to package directions until al dente (still with a slight bite in the center).
- While pasta cooks, combine pesto sauce, pouring cream, and chopped sun-dried tomatoes in a saucepan.
- Gently bring the sauce mixture almost to a boil, then immediately reduce to a gentle simmer.
- After 3-5 minutes of simmering, add the cubed feta cheese and pitted kalamata olives to the sauce.
- Drain the pasta well when cooked (do not rinse).
- Combine the hot pasta with the warm sauce, stirring gently but thoroughly to coat every piece of pasta.
- Serve immediately in warmed bowls.