===
Why You’ll Love This Hearty Moroccan Harira Soup
This Moroccan Harira soup isn’t just a meal—it’s pure comfort in a bowl.
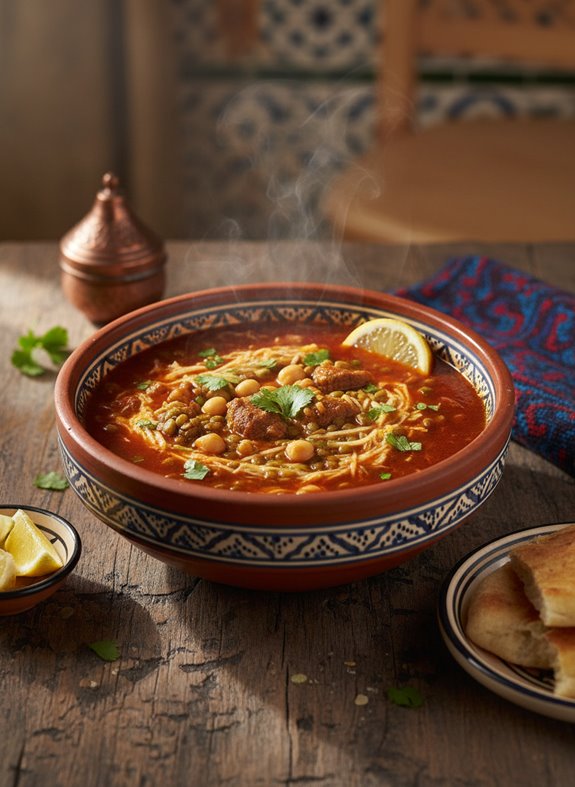
The fragrant blend of spices like turmeric, cinnamon, and ginger creates a complex flavor profile that’ll transport you straight to a Moroccan kitchen. I love how the tender lamb melts in your mouth while the lentils and chickpeas add hearty substance.
What makes this recipe special? It’s incredibly filling yet doesn’t weigh you down.
The vermicelli noodles soak up all those aromatic juices, and that final touch of lemon adds the perfect brightness to balance the rich, savory base. Trust me, your kitchen will smell amazing.
What Ingredients are in Hearty Moroccan Harira Soup?
Traditional Moroccan harira is a protein-packed soup that combines tender meat, legumes, and aromatic spices to create something truly magical. The ingredient list might look long at first glance, but don’t let that intimidate you—each component plays an important role in building those deep, complex flavors that make this soup so satisfying. From the warm spices to the bright finish of lemon juice, every element works together in perfect harmony.
- 1 pound cubed lamb
- 1 teaspoon ground turmeric
- 1½ teaspoons ground black pepper
- 1 teaspoon ground cinnamon
- ¼ teaspoon ground ginger
- ¼ teaspoon ground cayenne pepper
- 2 tablespoons margarine (or butter)
- ¾ cup chopped celery
- 1 regular onion, chopped
- 1 red onion, chopped
- ½ cup chopped fresh cilantro
- 1 (29 ounce) can diced tomatoes
- 7 cups water
- ¾ cup green lentils
- 1 (15 ounce) can garbanzo beans (chickpeas), drained
- 4 ounces vermicelli pasta
- 2 eggs, beaten
- Juice of 1 lemon
You might notice this recipe calls for margarine, but feel free to substitute with butter or even olive oil if you prefer. The vermicelli pasta should be broken into smaller pieces before adding to the soup—this helps it distribute evenly throughout. For a vegetarian version, you could omit the lamb and double the lentils and chickpeas for protein, while using vegetable broth instead of water for extra flavor. And if cilantro isn’t your thing (I know some people think it tastes like soap), you can substitute with flat-leaf parsley for a different but equally fresh finish.
How to Make This Hearty Moroccan Harira Soup
Making harira is all about layering flavors from the very beginning. Start by placing 1 pound of cubed lamb in a large soup pot over low heat, along with all those aromatic spices: 1 teaspoon ground turmeric, 1½ teaspoons ground black pepper, 1 teaspoon ground cinnamon, ¼ teaspoon ground ginger, and ¼ teaspoon ground cayenne pepper.
Add 2 tablespoons of margarine, ¾ cup chopped celery, both the chopped regular and red onions, and ½ cup fresh cilantro. This fragrant mixture needs to be stirred frequently for about 5 minutes—this step is essential for awakening the spices and creating that deep flavor base. Then pour in the 29-ounce can of diced tomatoes (but hold onto that tomato juice for later!) and let everything simmer together for 15 minutes, allowing the meat to begin tenderizing and the flavors to meld.
Now comes the body of the soup. Pour that reserved tomato juice into the pot along with 7 cups of water and ¾ cup green lentils.
This is where patience becomes your best friend in the kitchen. Bring the mixture to a boil, then reduce the heat, cover the pot, and let it simmer gently for 2 hours. During this time, the lamb becomes meltingly tender, the lentils soften, and all those complex flavors develop into something truly special.
About 10 minutes before you’re ready to serve, turn the heat up to medium-high and add the drained 15-ounce can of garbanzo beans and 4 ounces of vermicelli pasta (broken into smaller pieces).
Finally, gently stir in 2 beaten eggs—they’ll cook instantly, creating lovely ribbons throughout the soup—and finish with the juice of 1 lemon, which brightens all those deep, rich flavors and brings everything into perfect balance.
Hearty Moroccan Harira Soup Substitutions and Variations

While the classic recipe creates a magnificent soup, Harira’s beauty lies in its adaptability to what you have on hand.
Don’t have lamb? Chicken works wonderfully, or go vegetarian by doubling the lentils and chickpeas. I sometimes swap vermicelli for broken angel hair pasta or even rice when my pantry’s looking sparse.
Feel free to play with the spices too. More cayenne for heat lovers, less cinnamon if you find it overwhelming.
Fresh herbs running low? Dried cilantro or parsley will do in a pinch. And those green lentils can easily be red or brown—just adjust your cooking time accordingly.
Soup-making should never be stressful.
What to Serve with Hearty Moroccan Harira Soup

To complete the Moroccan feasting experience, Harira soup deserves thoughtful accompaniments that complement its rich flavors.
I always serve mine with warm, fluffy flatbreads—either homemade khobz or store-bought pita works beautifully for sopping up that savory broth.
A simple side of marinated olives and a small plate of dates provide the perfect sweet-savory contrast.
For special occasions, I’ll add a cool cucumber and mint salad dressed with lemon juice.
Final Thoughts
Harira soup holds a special place in my heart as the perfect combination of comfort and adventure on a plate. The rich blend of lamb, lentils, and aromatic spices creates a dish that’s both nourishing and exciting—truly the best of both worlds.
I’ve found that harira isn’t just a meal, it’s an experience to be savored. The way the vermicelli soaks up the fragrant broth, how the lemon juice brightens each spoonful… it’s culinary magic in a bowl.
Next time you’re craving something that warms both body and soul, remember this Moroccan treasure.
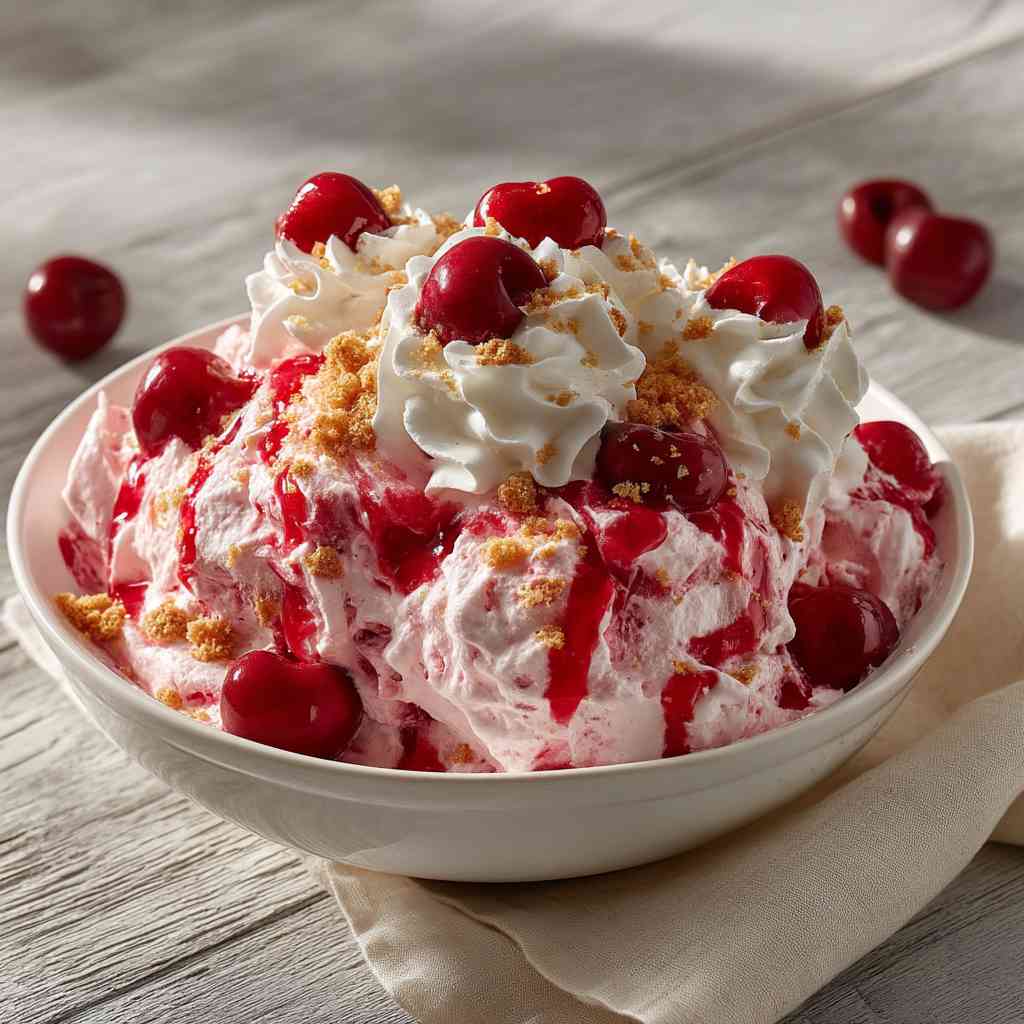
Cherry Cheesecake Fluff
Ingredients
Equipment
Method
- In a large mixing bowl, beat the softened cream cheese until completely smooth and creamy. This step is crucial for a lump‐free texture.
- Add the sweetened condensed milk and non‐alcoholic vanilla extract, blending the mixture until it becomes uniform and velvety.
- Gently fold in the thawed whipped topping, taking care to preserve the air bubbles that create the light and airy consistency.
- Stir in the cherry pie filling, leaving some beautiful swirls, then gently fold in the mini marshmallows and, if using, the chopped pecans or walnuts.
- Cover the bowl and refrigerate the mixture for at least 2 hours. This chilling time allows the flavors to meld together and the dessert to set into a perfect spoonable consistency.
- When ready to serve, present the Cherry Cheesecake Fluff in a trifle dish or individual dessert cups. Enjoy the creamy, refreshing treat as a standout dessert option.
Notes
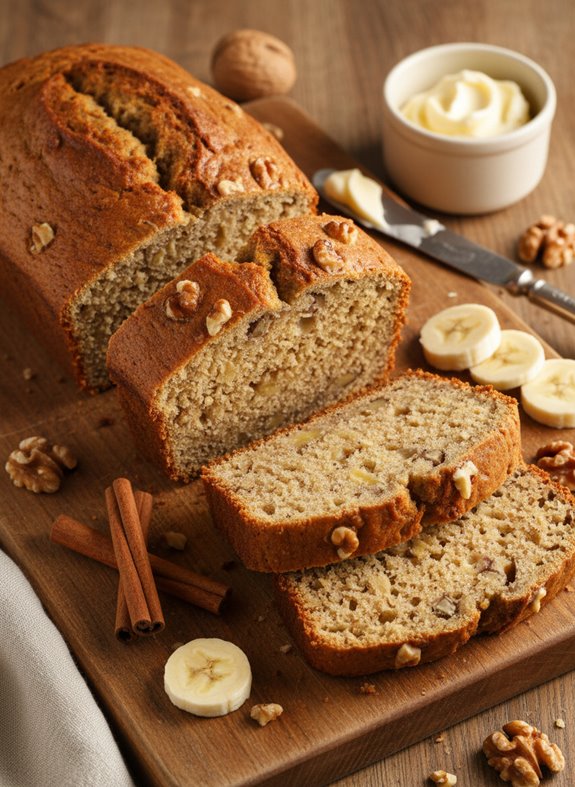
Mama’s Heartwarming Banana Bread
Ingredients
Equipment
Method
- Preheat your oven to 350°F (175°C).
- In a medium bowl, sift together the 3 cups of all-purpose flour, 1/2 teaspoon salt, and 2 teaspoons baking soda. Set the dry ingredients aside.
- In a large mixing bowl, melt the 8 ounces (2 sticks) of butter and beat it together with 2 cups of sugar until the mixture becomes light and well-blended.
- Add the 2 large eggs one at a time to the butter-sugar mixture, beating thoroughly after each addition. Then fold in the 2 cups of mashed bananas and 1/4 teaspoon vanilla extract.
- Gently incorporate the flour mixture and 1 cup of chopped walnuts into the wet ingredients, being careful not to overmix to ensure a tender crumb.
- Divide the batter equally between two greased 9x5x3-inch loaf pans.
- Bake in the preheated oven for about 60 minutes, or until the center feels firm and a toothpick inserted into the center comes out clean (a few moist crumbs are okay).
Notes
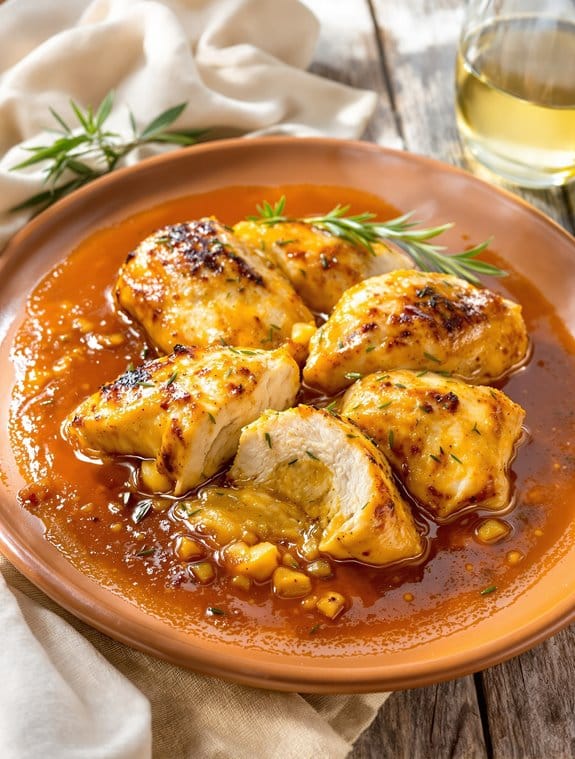
Tuscan Chicken Recipe: Herb-Kissed Italian Comfort
Ingredients
Equipment
Method
- Season chicken tenderloins generously with salt and pepper on both sides.
- Heat olive oil in a large skillet over medium-high heat. Add the chicken and minced garlic, browning for about 2 minutes per side. The chicken should develop a golden crust but not be fully cooked through.
- Remove the chicken from the pan and set aside on a plate.
- Pour white wine vinegar into the hot pan to deglaze, scraping up the flavorful brown bits from the bottom. Allow the vinegar to mostly evaporate.
- Add butter to the pan along with chopped shallots and finely chopped fresh rosemary. Cook the aromatics for about 2 minutes until fragrant and shallots begin to soften.
- Sprinkle flour into the pan and stir continuously for 1 minute to cook out the raw flour taste.
- Whisk in white wine and let it reduce for about 1 minute.
- Add beef broth and bring the mixture to a gentle simmer.
- Return the chicken to the pan and simmer for 7-8 minutes until the chicken is cooked through and the sauce has thickened to a silky consistency.
Notes

Heartwarming Chicken Enchilada Casserole
Ingredients
Equipment
Method
- Preheat your oven to 350°F (175°C).
- Begin assembly by laying 3-4 flour tortillas on the bottom of your baking dish, slightly overlapping them to create a base.
- Spread a layer of shredded chicken over the tortillas.
- Spoon some enchilada sauce generously over the chicken layer.
- Scatter portions of diced onion and corn across the top.
- Repeat these layers—tortillas, chicken, sauce, onion, and corn—until you've used all ingredients.
- Finish with a layer of tortillas topped with enchilada sauce to prevent the top from drying out.
- Bake until hot and bubbly, approximately 25-30 minutes.
- Allow the casserole to rest for about 5 minutes before serving to help the layers set.
Notes
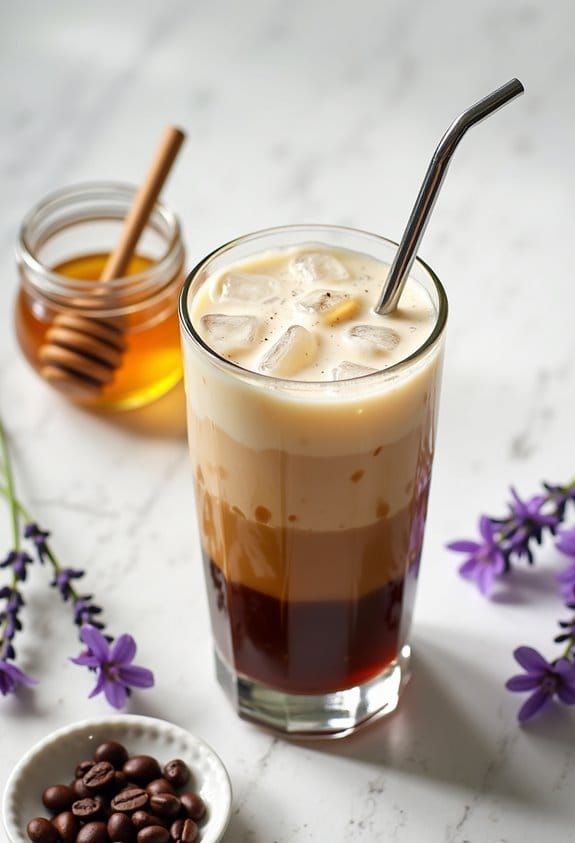
Lavender Honey Iced Latte
Ingredients
Equipment
Method
- Fill a tall glass with plenty of ice cubes.
- In a separate container, stir the honey and lavender syrup into the chilled coffee until completely dissolved.
- Pour the sweetened coffee mixture over the ice.
- Slowly add your preferred milk to create coffee-shop-worthy layers. For more defined layers, try pouring the milk over the back of a spoon.
- Give everything a good stir before drinking to marry all the flavors together.
Notes
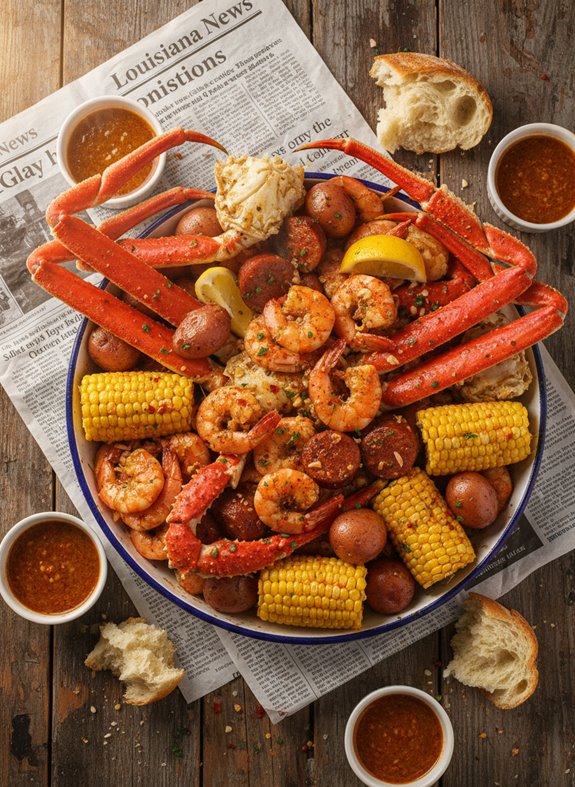
Spicy Cajun Crab Boil in Gitchi Gitchi Ila Sauce
Ingredients
Equipment
Method
- Preheat a large gumbo pot over medium heat.
- Add the diced onions, celery, and minced garlic to the pot along with 2 cups of salted butter. Sauté until the aromatics are soft and fragrant.
- Using a bullet blender or mortar and pestle, crush 2½ tablespoons rosemary, 4 teaspoons dried thyme, 2 teaspoons ground black pepper, 1 teaspoon fennel seed, and 2 teaspoons red pepper flakes to release their essential oils.
- Pour in 4 quarts of chicken broth, then add 16 ounces of clam juice and 6 tablespoons of tomato paste. Stir the mixture until well combined.
- Stir in 2-3 cups of red rose wine and let the liquid simmer to allow the spices and aromatics to meld together.
- Add the seafood and fixings: 2-4 pounds of shrimp, 4-5 pieces of crab legs, 3-4 pounds of smoked sausage, 6 red potatoes, and 6 halved corn cobs. Then mix in 4 tablespoons of red hot sauce, adjusting to your desired level of heat.
- Cook until the crab legs are heated through (about 5-6 minutes) and the shrimp turn pink and opaque (about 2-3 minutes). Be careful not to overcook the seafood.
- Serve the boil family-style on a large platter or over a newspaper-covered table, with 2 pounds of French bread on the side for soaking up the delicious sauce.
Notes
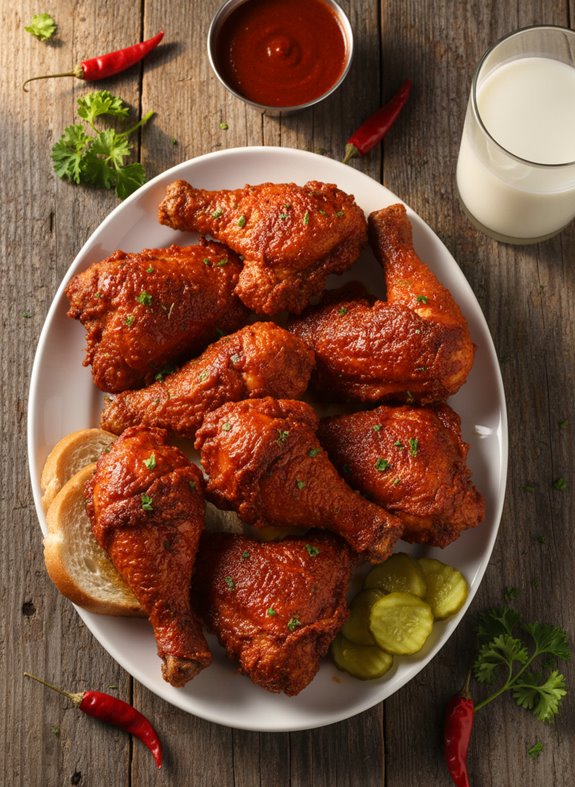
Fiery Crispy Nashville Hot Chicken
Ingredients
Equipment
Method
- Marinade and Spice Rub: In a large bowl, whisk together salt, paprika, onion powder, garlic powder, chili powder, black pepper, oregano, basil, and cayenne pepper. Remove about 1 1/2 tablespoons of this spice rub and combine it with 2 cups buttermilk and 2 bay leaves. Add the chicken pieces, ensuring an even coating. Cover and refrigerate for at least 3 hours (or overnight for best flavor).
- Set Up the Dredging Station: In one bowl, whisk together 2 eggs, 1 cup buttermilk, and 1/4 cup hot sauce to create the wet mixture. In a separate bowl, combine 3 1/2 cups all-purpose flour, 1 tablespoon baking powder, and the reserved spice rub.
- Dredge the Chicken: Remove each piece from the marinade, allowing excess to drip off. Dip the chicken into the wet mixture followed by a thorough coating in the seasoned flour. For extra crispiness, double-dip the chicken by repeating the wet and flour coating process.
- Fry the Chicken: Heat vegetable oil in a large, heavy pot or deep fryer to 325°F. Fry the chicken in batches until golden brown and cooked through, about 15-20 minutes, turning occasionally.
- Prepare the Spicy Coating: In a small bowl, whisk together 3/4 cup vegetable oil, 2 tablespoons hot sauce, 2 tablespoons melted butter, 1 tablespoon ground cayenne pepper, 2 tablespoons brown sugar, and 1/2 teaspoon smoked paprika.
- Finish and Serve: While the chicken is still warm and draining on paper towels, generously brush or drizzle the spicy coating over the pieces. Serve immediately with sides like white bread, pickles, coleslaw, or potato salad to balance the heat.
Notes

Perfect Steak Marinade
Ingredients
Equipment
Method
- Place your steak on a flat surface or in a shallow dish.
- Drizzle both soy sauce and Worcestershire sauce generously over both sides of the steak, enough to coat but not drown the meat.
- Sprinkle garlic powder and celery salt evenly across both sides of the steak.
- Use your fingertips to gently press the seasonings into the meat to ensure they adhere properly.
- Allow the steak to rest at room temperature for about 1 hour to let the flavors meld and begin tenderizing the meat.
- Preheat your grill to medium-high heat.
- Cook the marinated steak to your preferred doneness. For medium-rare, aim for an internal temperature of 130-135°F; for medium, 140-145°F.
- Let the steak rest for 5-10 minutes after cooking before slicing to allow juices to redistribute throughout the meat.
Notes
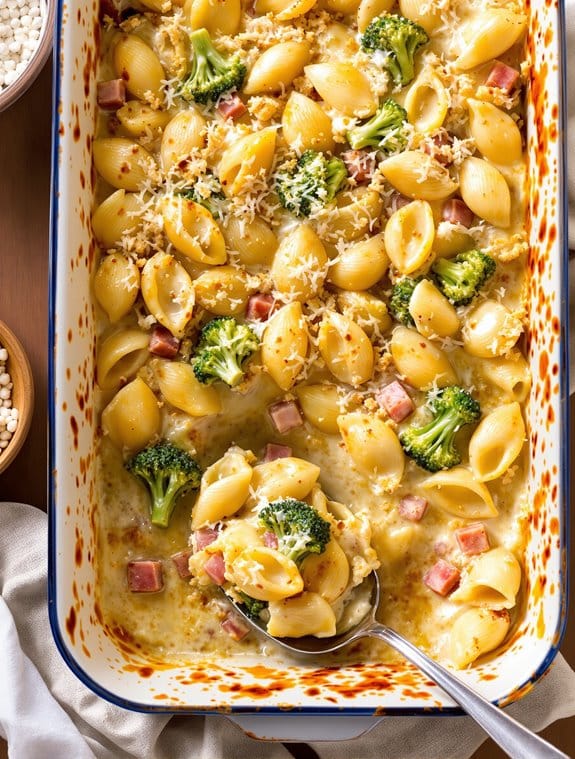
Baked Shells: Ham, Broccoli, Cheesy Cauliflower
Ingredients
Equipment
Method
- Preheat oven to 400°F.
- Heat olive oil in a medium saucepan over medium heat. Add cauliflower, garlic, and shallots with a pinch of salt. Cook for about 10 minutes until softened, stirring occasionally but avoiding browning.
- Sprinkle flour over the vegetable mixture and stir well to coat everything evenly.
- Gradually pour in the skim milk while stirring constantly. Bring to a boil, then reduce heat to a gentle simmer. Cook for about 15 minutes until the cauliflower becomes very soft.
- Remove from heat and let cool for 5 minutes.
- Transfer the mixture to a blender. Add nutmeg and half of the grated pecorino cheese. Blend until completely smooth, about 2 minutes.
- Meanwhile, cook the multigrain pasta shells in salted water for just 5 minutes (they should be slightly tender but not fully cooked).
- Drain the pasta shells and return them to the pot. Add the chopped ham, broccoli florets, and the cauliflower sauce. Toss until everything is well-coated.
- Transfer the mixture to a 3 1/2-quart baking dish. Sprinkle the remaining pecorino cheese on top.
- Bake for about 30 minutes, until bubbling in the center.
- Switch to the broiler for 1-2 minutes to achieve a golden-brown crust (watch carefully to prevent burning).
- Remove from oven and let rest for 5 minutes. Top with toasted whole-wheat panko breadcrumbs and serve immediately.