
===
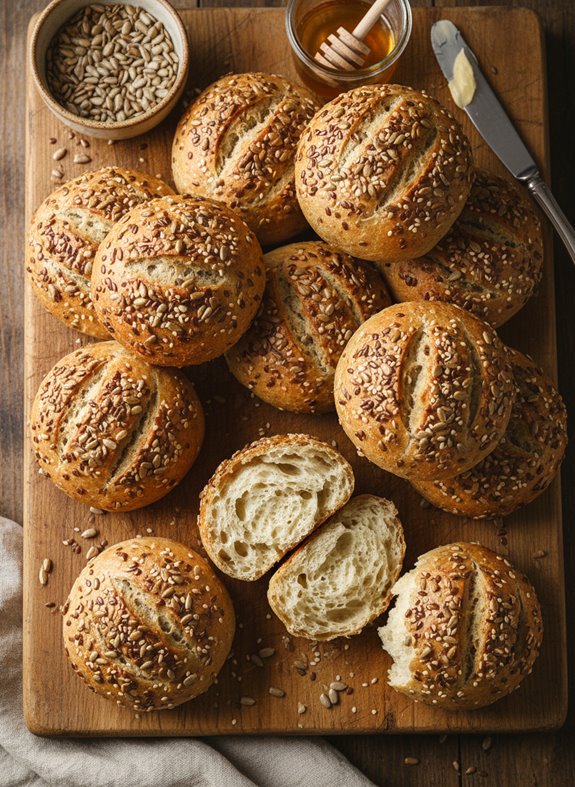
Why You’ll Love These Soft & Nutty Sunflower Seed Rolls
If you’re searching for a homemade bread that strikes the perfect balance between hearty and wholesome, these Sunflower Seed Rolls are about to become your new favorite.
I’m obsessed with how the nutty sunflower seeds complement the earthy rye flour, creating a texture that’s both substantial and tender.
What makes these rolls special? The combination of three different seeds—sunflower, sesame, and soaked flax—adds incredible nutrition while the touch of honey provides just enough sweetness.
They’re versatile enough for sandwiches or simply slathered with butter. And that crispy crust? Pure bread heaven.
What Ingredients are in Soft & Nutty Sunflower Seed Rolls?
These sunflower seed rolls combine the perfect balance of hearty flours, seeds, and just a touch of sweetness to create a bread that’s both nutritious and delicious.
I’m always amazed at how just a handful of simple ingredients can transform into something so satisfying. The blend of regular and rye flour gives these rolls their distinctive flavor profile, while the trio of seeds adds wonderful texture and nuttiness.
- 2½ cups all-purpose flour
- 1½ cups rye flour
- 2 teaspoons salt
- 3 teaspoons yeast
- 1 tablespoon honey
- 1⅔ cups water (divided)
- ½ cup sunflower seeds
- 4 tablespoons sesame seeds
- 4 tablespoons flax seeds (soaked overnight)
- Milk (for brushing tops)
When shopping for ingredients, quality matters. Look for fresh seeds if possible, as they’ll contribute more flavor to your rolls.
And don’t skip that overnight soak for the flax seeds—it’s essential for softening them and releasing their nutritional benefits. The rye flour might be found in the specialty baking section of your grocery store if you don’t spot it with the regular flours.
And while the recipe doesn’t specify, I recommend using active dry yeast, though instant would work with slight adjustments to the proofing step.
Wondering about substitutions? You could swap in different seeds based on what you have on hand, but the sunflower seeds are really the star here.
How to Make These Soft & Nutty Sunflower Seed Rolls
Making these sunflower seed rolls is honestly one of the most satisfying baking projects—nothing beats the smell of homemade bread wafting through the kitchen.
Start by combining 2½ cups of all-purpose flour, 1½ cups of rye flour, and 2 teaspoons of salt in a large bowl. In a separate small bowl, proof your 3 teaspoons of yeast by dissolving it with 1 tablespoon of honey in ¼ cup of warm water. Let this mixture sit until it becomes foamy and active, about 5-10 minutes. Once the yeast is bubbling away (always a magical moment, isn’t it?), add it to your flour mixture along with the remaining water from the 1⅔ cups total.
Now comes the therapeutic part—kneading the dough for a full 10 minutes until it’s smooth and elastic. The dough might seem a bit sticky at first, but resist adding too much extra flour. After achieving that perfect consistency, it’s time to fold in ½ cup of sunflower seeds, 4 tablespoons of sesame seeds, and those 4 tablespoons of flax seeds that you’ve thoughtfully soaked overnight.
Place your seeded dough in a greased bowl, cover it with a damp cloth, and let it rise until doubled in size. This usually takes about an hour, depending on how warm your kitchen is. Once risen, punch down the dough (my favorite stress-relieving step!) and shape it into 12 evenly sized buns.
For the final touches, brush the tops with water and place the rolls on a greased cookie sheet. Using a sharp knife, make shallow slices across the tops—this gives them that artisanal bakery look and helps them expand properly while baking.
Cover the rolls and let them rise once more until puffy, about 30-45 minutes. Before popping them into the oven, brush the tops with milk for a beautiful golden finish. Bake at 350 degrees Fahrenheit for approximately 30 minutes, or until they’re golden brown. Remember, if you prefer a crispier crust, you can increase the temperature slightly.
The rolls should sound hollow when tapped on the bottom when they’re done. Let them cool slightly on a wire rack before serving, though I rarely have the patience to wait that long!
Soft & Nutty Sunflower Seed Rolls Substitutions and Variations
While these classic sunflower seed rolls are absolutely delightful as-is, I love playing with different ingredient swaps to create exciting variations.
Try substituting pumpkin seeds for sunflower seeds, or go wild with a mix of your favorite nuts and seeds. Don’t have rye flour? All-purpose works fine in a pinch, though the flavor profile shifts a bit.
For a sweeter twist, I sometimes add dried cranberries or currants. The tanginess pairs beautifully with the nutty seeds.
You can also experiment with herbs—rosemary and thyme make these rolls perfect companions for soup night at my house, where they disappear faster than I can say “pass the butter.”
What to Serve with Soft & Nutty Sunflower Seed Rolls
Soft and nutty sunflower seed rolls pair beautifully with at least three different meal categories, making them versatile additions to your table.
I love serving these with hearty soups—think minestrone or beef stew—where they’re perfect for sopping up those last delicious drops. Can’t let that goodness go to waste, right?
They also complement any cheese board wonderfully. The nutty flavor plays against creamy brie or sharp cheddar in ways that still make me swoon.
For breakfast? Try splitting them, toasting lightly, and adding avocado or a soft-boiled egg. My Saturday morning go-to when I’m feeling fancy but not ambitious.
Final Thoughts
These sunflower seed rolls have become a staple in my kitchen, and I’m confident they’ll find a place in yours too.
There’s something magical about the combination of nutty sunflower seeds, hearty rye, and that perfectly crispy crust. The recipe is forgiving, even for baking newbies—trust me, I’ve had my share of bread disasters.
Remember to let the dough properly rise, knead in those seeds thoroughly, and don’t rush the baking process.
The aroma that fills your home? Worth every minute. These rolls freeze beautifully, so consider doubling the batch for future meals.

BBQ Chicken Salad
Ingredients
Equipment
Method
- Slice chicken breasts into three-inch strips.
- Heat olive oil in a large skillet and cook chicken strips until golden-brown edges appear and chicken is cooked through.
- While chicken cooks, prepare the BBQ sauce by whisking together ketchup, brown sugar, paprika, and minced garlic in a bowl until smooth.
- Reduce heat and pour the BBQ sauce over the cooked chicken. Continue cooking until chicken is well coated and the sauce begins to caramelize slightly.
- Remove the glazed chicken from heat and refrigerate to cool while preparing the salad components.
- Clean and chop romaine lettuce into bite-sized pieces and arrange in the bottom of a large serving bowl.
- Layer black beans, corn kernels, red onion, and tomato pieces over the lettuce base.
- Add shredded carrot and chopped red bell pepper for additional color and crunch.
- Drizzle ranch dressing over the vegetables.
- Sprinkle shredded cheddar cheese across the salad.
- Arrange the cooled BBQ chicken on top of the salad and serve.
Notes

Roasted Garlic Bacon Butter
Ingredients
Equipment
Method
- Preheat your oven to 400°F. Trim the top off a whole garlic head, drizzle it with olive oil, wrap it in foil, and roast for 35–40 minutes until the cloves become soft and sweet.
- Allow the roasted garlic to cool, then squeeze out two cloves and mash them until smooth.
- In a bowl, combine the softened unsalted butter with the mashed roasted garlic, crumbled bacon (using 1–3 tablespoons depending on your taste), and freshly ground black pepper. If using unsalted butter, add a small pinch of kosher salt to balance the flavors.
- For an extra touch of freshness and complexity, stir in the optional chopped parsley and a tiny pinch of smoked paprika.
- Spoon the mixture onto a piece of parchment paper or plastic wrap and roll it into a tight log about 1½ inches thick. Twist the ends to seal it completely.
- Refrigerate the butter log until firm—this takes about an hour, or you can freeze it for 20–30 minutes if you’re in a hurry.
- When ready to use, slice the log into coins and serve over steaks, burgers, baked potatoes, roasted vegetables, or even stir into pasta for a savory upgrade.
Notes
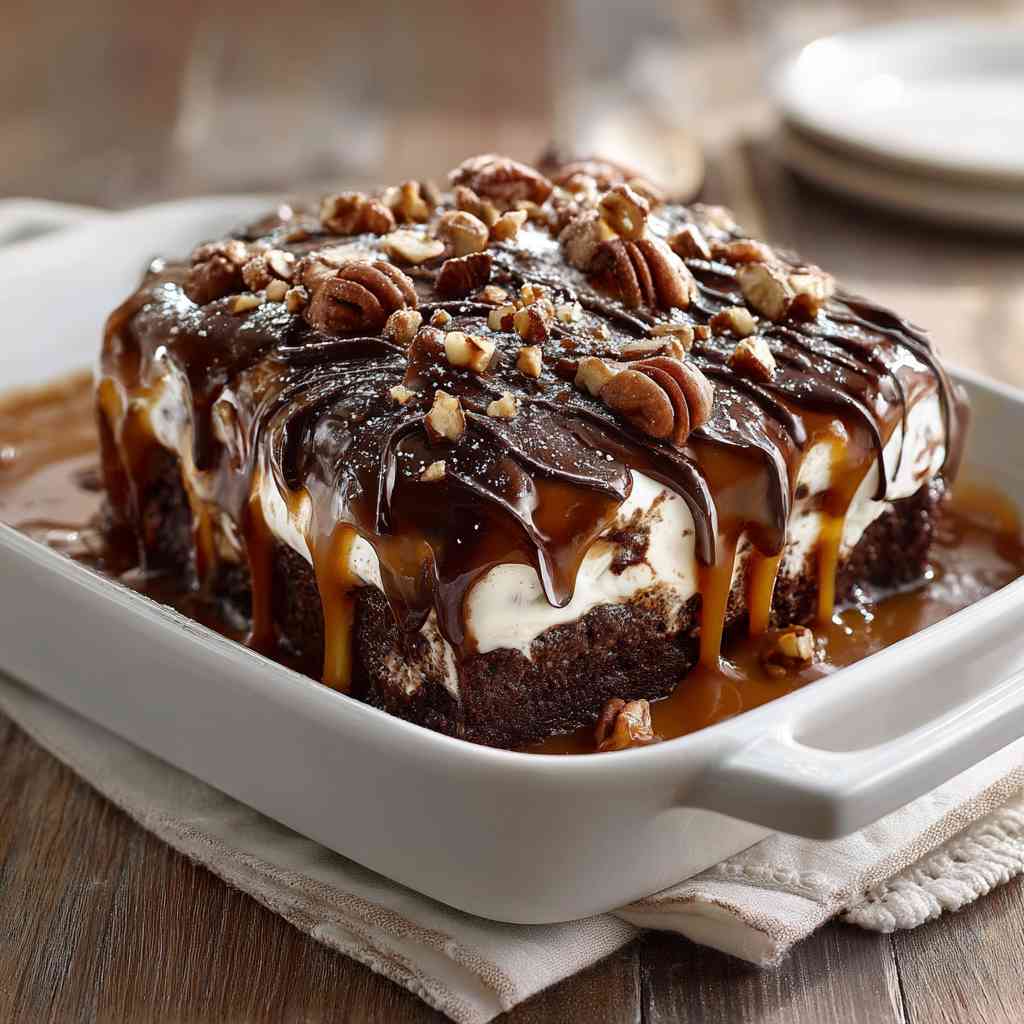
Turtle Poke Cake
Ingredients
Equipment
Method
- Preheat your oven to 350°F and lightly grease a 9×13-inch baking pan.
- In a large bowl, whisk together the chocolate fudge cake mix, 1 cup water, ½ cup vegetable oil, and 3 large eggs until smooth.
- Pour the batter into the prepared pan, spreading it evenly. Bake for about 28-32 minutes, or until a toothpick inserted into the center comes out clean.
- While the cake is still warm, use the handle of a wooden spoon to poke holes about an inch apart all over the top.
- In a small bowl, combine 1 cup caramel sauce and 1 can (14 oz) of sweetened condensed milk. Pour this mixture evenly over the cake, allowing it to seep into the holes.
- Allow the cake to cool completely.
- Once cooled, sprinkle 1 ½ cups of semi-sweet chocolate chips and 1 ½ cups of toasted chopped pecans evenly over the top, gently pressing them into the surface.
- Drizzle an additional 1 cup of caramel sauce over everything.
- If desired, serve with 1 cup of whipped topping or whipped cream for an extra touch of indulgence.
Notes

No-Bake Witch Hat Cookies
Ingredients
Equipment
Method
- Line 2 sheet pans with parchment paper and unwrap all 24 chocolate kisses.
- Melt the chocolate chips in a microwave-safe bowl at 50% power in 30-second intervals, stirring between each burst until about 90% melted. Stir to finish melting completely. Add optional oil for shinier chocolate if desired.
- If using plain cookies, dip the top of each cookie into the melted chocolate, covering the surface and outer edge to create the wide brim of the witch hat. Place chocolate-side-up on the lined pan.
- Refrigerate the chocolate-dipped cookies for about 10 minutes until the chocolate firms up.
- Meanwhile, whisk together the powdered sugar and water to make a thick icing with toothpaste consistency. Divide this mixture between 2-3 small bowls and tint with gel food coloring in orange, green, or purple.
- Transfer the colored icing to piping bags (or zip-top bags with a tiny corner snipped off) and pipe a neat ring about 1 inch across in the center of each cookie to create the decorative band around the witch hat.
- Immediately press a chocolate kiss into the icing ring on each cookie, holding it for 3-5 seconds to secure. For even bands, try gently spinning the cookie as you press down the kiss.
- Allow the cookies to stand at room temperature for 15-20 minutes until the icing firms up before serving.
Notes

Tender Pressure Cooker Beef Stew
Ingredients
Equipment
Method
- In a small bowl, combine Emeril's Essence spice mix with 2 tablespoons of all-purpose flour.
- Season the chuck roast cubes with ¼ teaspoon salt and ¼ teaspoon pepper. Dredge the meat in the seasoned flour mixture until lightly coated.
- Heat 4 tablespoons of olive oil in your pressure cooker on the sauté setting. Brown the meat in batches, cooking each side for about 2-3 minutes until a rich crust forms. Avoid overcrowding to ensure proper searing.
- Remove the browned meat and set it aside. Add the cubed sweet onion to the pot, scraping up the browned bits from the bottom.
- Cook the onion until it becomes translucent, then add the minced garlic and stir for about 30 seconds until fragrant.
- Pour in ¼ cup of red wine to deglaze the pot, allowing it to simmer for a minute while stirring.
- Return the beef to the pot and add 1 to 1¼ cups of beef stock, 1 tablespoon of balsamic vinegar, and the bay leaves.
- Add the red potatoes, carrots, and celery. Give everything a gentle stir to combine.
- Secure the lid on your pressure cooker, ensuring the valve is set to the sealing position. Cook on high pressure for about 35 minutes.
- Allow the pressure cooker to release pressure naturally for 10 minutes, then manually release any remaining pressure.
- Remove the bay leaves. For a thicker gravy, switch the cooker back to the sauté setting and simmer uncovered for a few additional minutes.
- Stir the stew well and serve warm.
Notes
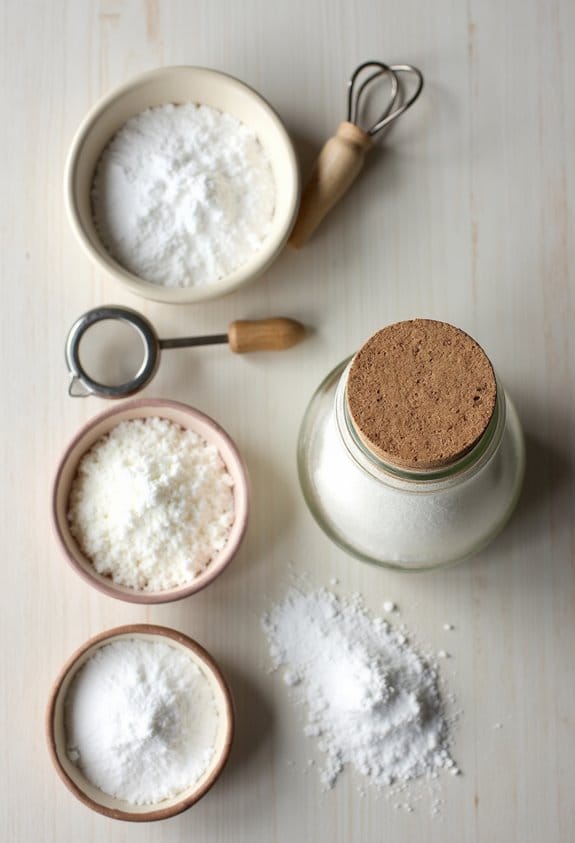
Homemade Baking Powder
Ingredients
Equipment
Method
- Gather your ingredients: cream of tartar, baking soda, and cornstarch (or arrowroot/tapioca if avoiding corn).
- Use a small sieve to break up any lumps in the baking soda before mixing.
- Combine all ingredients in a bowl and whisk thoroughly until completely uniform with no streaky patches.
- Transfer immediately to a dry, airtight container to prevent moisture from activating the powder prematurely.
- Store in a cool cupboard away from the stove or any sources of steam.
- To test freshness, stir ½ teaspoon into ¼ cup of hot water - vigorous fizzing indicates it's still good.
Notes

Boston Cream Filling
Ingredients
Equipment
Method
- In a medium saucepan, combine 1/2 cup sugar, 1/4 cup cornstarch, and 1/4 teaspoon salt. Whisk the dry ingredients together thoroughly to prevent lumps.
- Add 2 cups milk, 1 teaspoon vanilla extract, and 4 egg yolks to the dry mixture. Whisk until the mixture becomes completely smooth.
- Place the saucepan over medium heat and stir constantly. Continue stirring for about 5-8 minutes until the custard thickens enough to coat the back of a spoon.
- Remove the saucepan from heat and transfer the custard to a bowl. Immediately place a piece of plastic wrap directly on the surface to prevent a skin from forming.
- Allow the filling to cool completely in the refrigerator. Once cooled, if desired, gently fold in 1 cup of whipped cream for a lighter texture or stir in 2 ounces of melted baking chocolate for a chocolate twist.
Notes

Creamy Prosciutto Carbonara
Ingredients
Equipment
Method
- Chop the prosciutto ham into small chunks. Tip: Rolling the sliced ham before cutting creates perfect little morsels.
- In a mixing bowl, combine the hard-boiled egg yolks, grated Parmesan cheese, black pepper, and oregano. Use a fork to break up the eggs until roughly combined.
- Add the chopped prosciutto to the bowl with the egg mixture.
- Pour in the half-and-half and stir everything together until well combined.
- Transfer the mixture to a saucepan and simmer over low heat. Be patient and stir occasionally to prevent the sauce from breaking.
- Meanwhile, cook your pasta of choice according to package instructions until al dente.
- If the sauce isn't thick enough after simmering, mix a teaspoon of cornstarch with cold water and add it to the sauce, stirring until it reaches your desired consistency.
- Drain the pasta and return it to the pot.
- Pour the creamy prosciutto sauce over the pasta and toss gently to coat evenly.
- Serve immediately, garnished with additional black pepper or Parmesan if desired.
Notes
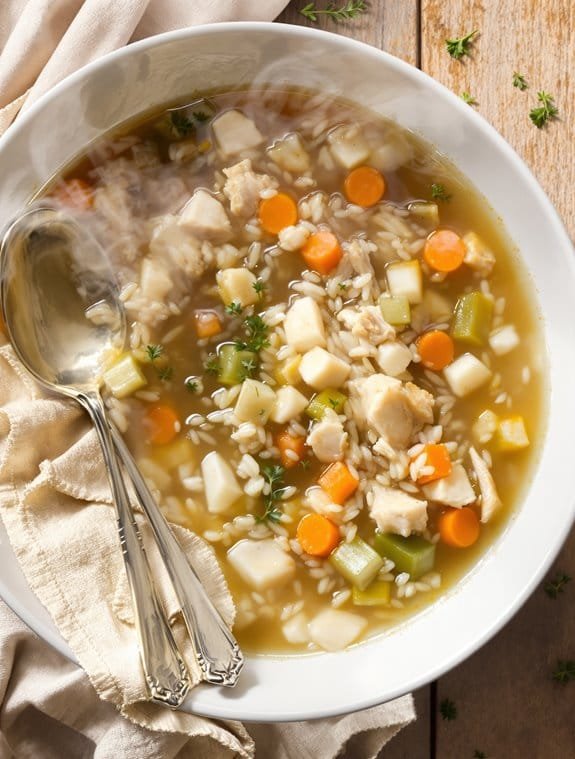
Chicken and Rice Soup
Ingredients
Equipment
Method
- Bring 5-6 cups of water to a rolling boil in a large pot.
- Add the diced carrots, sliced celery, chicken bouillon cube, and a pinch of salt to the boiling water.
- Let the mixture boil for 5-10 minutes until the vegetables begin to soften.
- Add the diced cooked chicken meat and long grain rice to the pot. If available, add any chicken skin or fat for extra flavor.
- Cook until the rice is nearly tender, about 15-20 minutes, stirring occasionally.
- In a small bowl, create a slurry by mixing the cornstarch or flour with a little cold water.
- Slowly stir the slurry into the simmering soup to thicken it.
- Adjust consistency by adding more water if too thick or simmering longer if too thin.
- Season to taste with salt and freshly ground black pepper.
- Give everything a final stir before serving hot.
Notes

Iced Cinnamon Honey Latte
Ingredients
Equipment
Method
- In a small saucepan, combine milk, honey, and ground cinnamon.
- Heat the mixture gently just until warm (not boiling), stirring until the honey completely dissolves into the milk.
- Fill a tall glass generously with ice cubes.
- Pour the cinnamon-honey milk mixture over the ice.
- Slowly add the cooled brewed coffee or espresso to create a layered effect.
- Stir to combine all flavors when ready to drink.
- Garnish with a cinnamon stick if desired.