Why You’ll Love This Not Yo Mama’s Banana Pudding
If you’re searching for a dessert that’ll make everyone at the table swoon, this Not Yo Mama’s Banana Pudding is about to become your new signature dish.
I’m talking creamy, dreamy layers of vanilla-infused goodness with a cream cheese twist that traditional recipes simply don’t deliver.
What makes it special? The combination of cream cheese and sweetened condensed milk creates a tangy-sweet base that’s miles beyond ordinary pudding.
Plus, those layers of vanilla wafers soften to cake-like perfection while still maintaining just enough structure.
Ever notice how some banana puddings turn soupy? Not this one, friends. It holds up beautifully for serving.
What Ingredients are in Not Yo Mama’s Banana Pudding?
This banana pudding is a dream come true, and what makes it so special is the combination of ingredients that elevate it far beyond the standard recipe your grandma might’ve made. The cream cheese gives it a tangy richness, while the sweetened condensed milk adds that perfect touch of sweetness that keeps you coming back for more. I’m always amazed at how these simple ingredients transform into something that makes guests ask for the recipe before they’ve even finished their first serving.
- 1 box (11-12 oz/about 300g) vanilla wafer cookies (like Nilla Wafers)
- 6-8 ripe bananas, sliced into rounds
- 1 package (8 oz/225g) cream cheese, softened
- 1 can (14 oz/400g) sweetened condensed milk
- 1 box (5 oz/140g) instant vanilla pudding mix
- 2 cups (480ml) cold milk
- 1 container (12 oz/340g) frozen whipped topping, thawed (or about 4 cups homemade whipped cream)
- 1 teaspoon non-alcoholic vanilla extract
When shopping for these ingredients, the ripeness of your bananas matters tremendously. You want them yellow with small brown spots—firm enough to slice cleanly but ripe enough for maximum flavor. The vanilla wafers can be name-brand or generic, but they should be fresh and crisp before assembly, as they’ll soften beautifully once layered. And while you could technically make your own whipped cream instead of using the frozen whipped topping, the stabilizers in store-bought help the pudding maintain its structure for serving and storing, which can be a lifesaver when preparing this dessert ahead of time.
How to Make This Not Yo Mama’s Banana Pudding
Making this indulgent banana pudding is surprisingly simple for such a showstopper dessert. Start by whisking together one box (5 oz/140g) of instant vanilla pudding mix with 2 cups of cold milk until it’s smooth and begins to thicken, which takes about 2 minutes. This forms the base of your pudding, but we’re just getting started.
Set this mixture aside while you work on the creamy layer that makes this recipe truly special. In a separate bowl, beat 1 package (8 oz/225g) of softened cream cheese with an electric mixer until it’s fluffy and smooth—those little lumps of cream cheese can ruin the silky texture we’re aiming for. Add 1 can (14 oz/400g) of sweetened condensed milk and mix until well combined, then fold in your prepared pudding mixture until smooth.
Gently fold in about two-thirds of a container (12 oz/340g) of thawed whipped topping, reserving the remaining third for the top layer. The folding technique is essential here, not stirring, as we want to maintain all that airy lightness that makes this pudding irresistible.
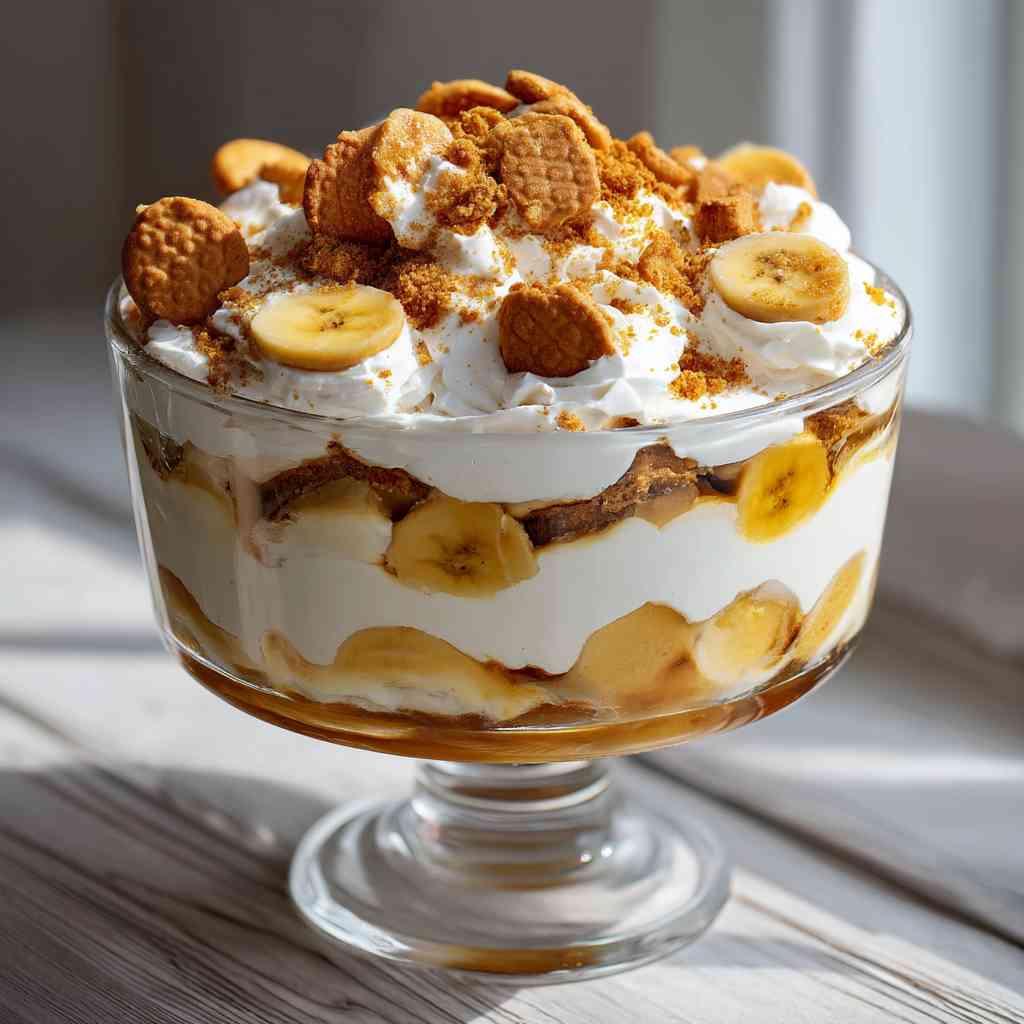
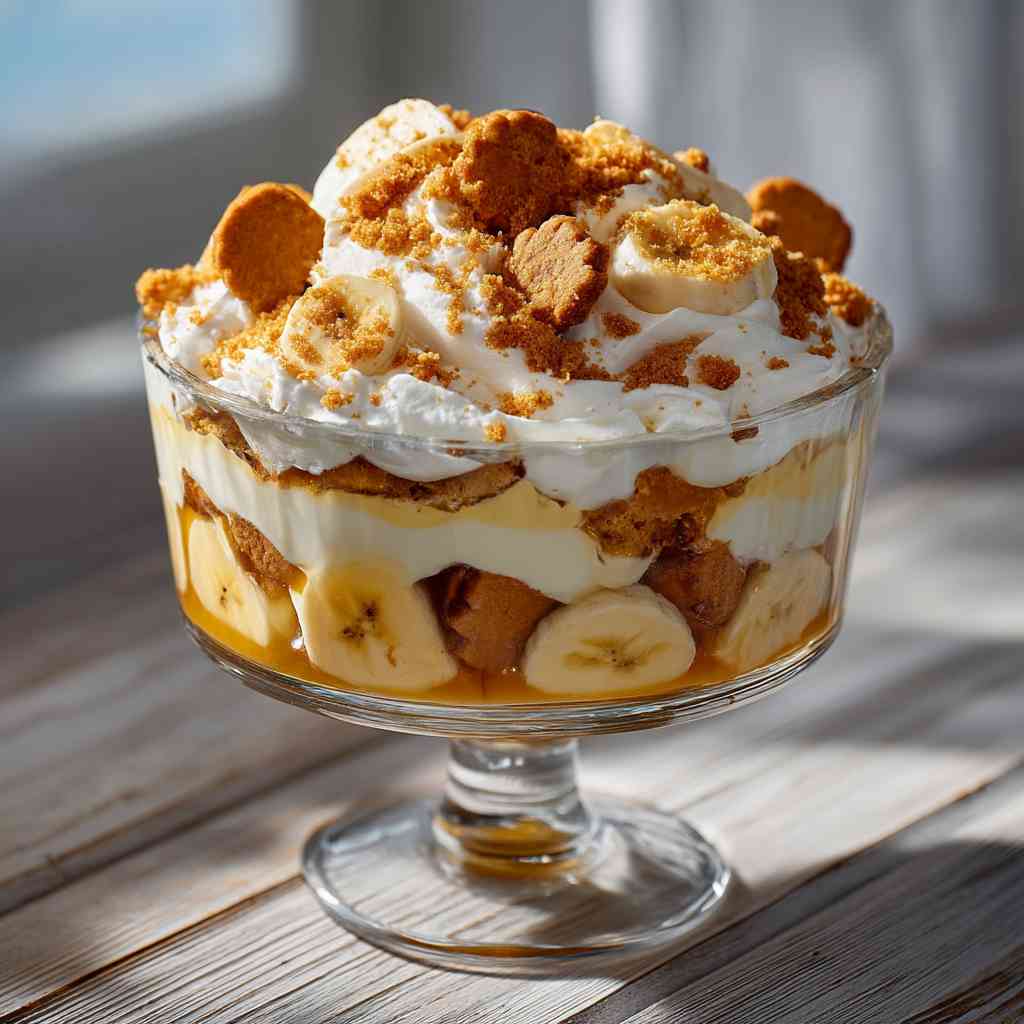
Now comes the fun part—layering the dessert. In a large trifle dish or glass bowl (don’t you love how impressive these look?), place a layer of vanilla wafer cookies from your 11-12 oz box, followed by a layer of sliced bananas from your 6-8 ripe bananas, and then spread a third of your creamy pudding mixture over the top.
Repeat these layers twice more, ending with the pudding mixture. Finish by spreading the reserved whipped topping over the very top, and for an extra touch of presentation, crush a few vanilla wafers to sprinkle over the whipped cream.
Refrigerate for at least 4 hours before serving, though overnight is even better as it allows the flavors to meld and the cookies to soften to that perfect texture.
Not Yo Mama’s Banana Pudding Substitutions and Variations
While the classic version of Not Yo Mama’s Banana Pudding delivers a crowd-pleasing punch, you’ve got plenty of room to customize this dessert to your preferences or dietary needs.
For a lighter version, swap regular cream cheese for reduced-fat or try Greek yogurt cream cheese. Can’t do dairy? Coconut milk pudding and dairy-free whipped topping work beautifully.
Feel free to experiment with flavors, too. Try chocolate pudding mix for a chocolatey twist, or add a splash of rum extract for grown-up flair. Nutella swirls, crushed peanut butter cups, or toasted coconut between layers? Divine.
Gluten-free? Simply substitute gluten-free cookies for the vanilla wafers.
What to Serve with Not Yo Mama’s Banana Pudding
Not Yo Mama’s Banana Pudding, in all its creamy glory, deserves thoughtful accompaniments to round out your dessert spread.
I love serving mine with hot coffee or cold milk to balance the sweetness. A scoop of vanilla ice cream alongside creates a delightful temperature contrast—warm pudding, cold ice cream. Divine.
Fresh berries make gorgeous garnishes while adding a bright, tart counterpoint.
Sometimes I’ll plate it with crisp butter cookies for extra crunch.
And when I’m feeling fancy? A drizzle of caramel sauce or a sprinkle of toasted coconut takes this already-impressive dessert to new heights.
Final Thoughts
Three key qualities make Not Yo Mama’s Banana Pudding absolutely unforgettable.
First, that cream cheese layer gives it a richness you simply can’t get in traditional recipes.
Second, the generous amount of vanilla wafers creates perfect textural contrast against those creamy layers.
And finally, those perfectly ripe banana slices bring everything together with their natural sweetness.
I’ve made this countless times for family gatherings, and the bowl is always scraped clean.
What I love most is how it actually tastes better the next day, when all those flavors have had time to mingle and marry together.
Not Yo Mama’s Banana Pudding
Ingredients
Equipment
Method
- In a medium bowl, whisk together the instant vanilla pudding mix and cold milk until smooth and well-blended. Allow the mixture to thicken for about 2 minutes and then set it aside.
- In a separate large bowl, beat the softened cream cheese with an electric mixer until light and fluffy. Add the sweetened condensed milk and mix until well combined.
- Fold the prepared pudding mixture into the cream cheese mixture until the texture is smooth. Then gently fold in about two-thirds of the thawed whipped topping, reserving the remaining third for the final layer.
- In a large trifle dish or glass bowl, create the layers: start with a layer of vanilla wafer cookies, add a layer of sliced bananas, then spread about one third of the pudding mixture over the top. Repeat the layers twice more, finishing with the pudding mixture.
- Spread the reserved whipped topping evenly over the top. For an extra touch, sprinkle a few crushed vanilla wafers over the whipped topping.
- Refrigerate for at least 4 hours, or overnight if possible, to allow the flavors to meld and the cookies to soften to perfection before serving.